
Introduction
Are you a DevOps Engineer but NOT using Linux? You’re missing out big time! In this blog post, I’ll share with you my recommended setup for Windows users using the Windows Subsystem for Linux (WSL2)
Video
Below is a video explanation and demo.
Video Chapters
You can skip to the relevant chapters below:
- 00:00 – Introduction
- 00:42 – WSL 2 Installation
- 06:21 – Windows Terminal Installation
- 09:49 – Git Installation for WSL 2
- 11:03 – Visual Studio Code with WSL 2
- 17:37 – Docker on WSL 2
- 20:27 – Wrap-up
Overview
As a DevOps Engineer, you really need to embrace Linux. I know this is not easy to hear for the Windows fans out there. While you can run most of the popular DevOps tools directly in Windows. You’ll have a much better time running in a Linux environment.
Fortunately, Microsoft has allowed Windows users to run a Linux VM in Windows 10 and higher. This is called Windows Subsystem for Linux 2 or WSL2 for short.
In this blog post, I share with you my recommended setup as a DevOps engineer running WSL2 on my Windows desktop. The above video lectures have been taken from my latest course: Terraform 101 – Certified Terraform Associate
Do you have other alternative setups? Please share them with me in the comments section.
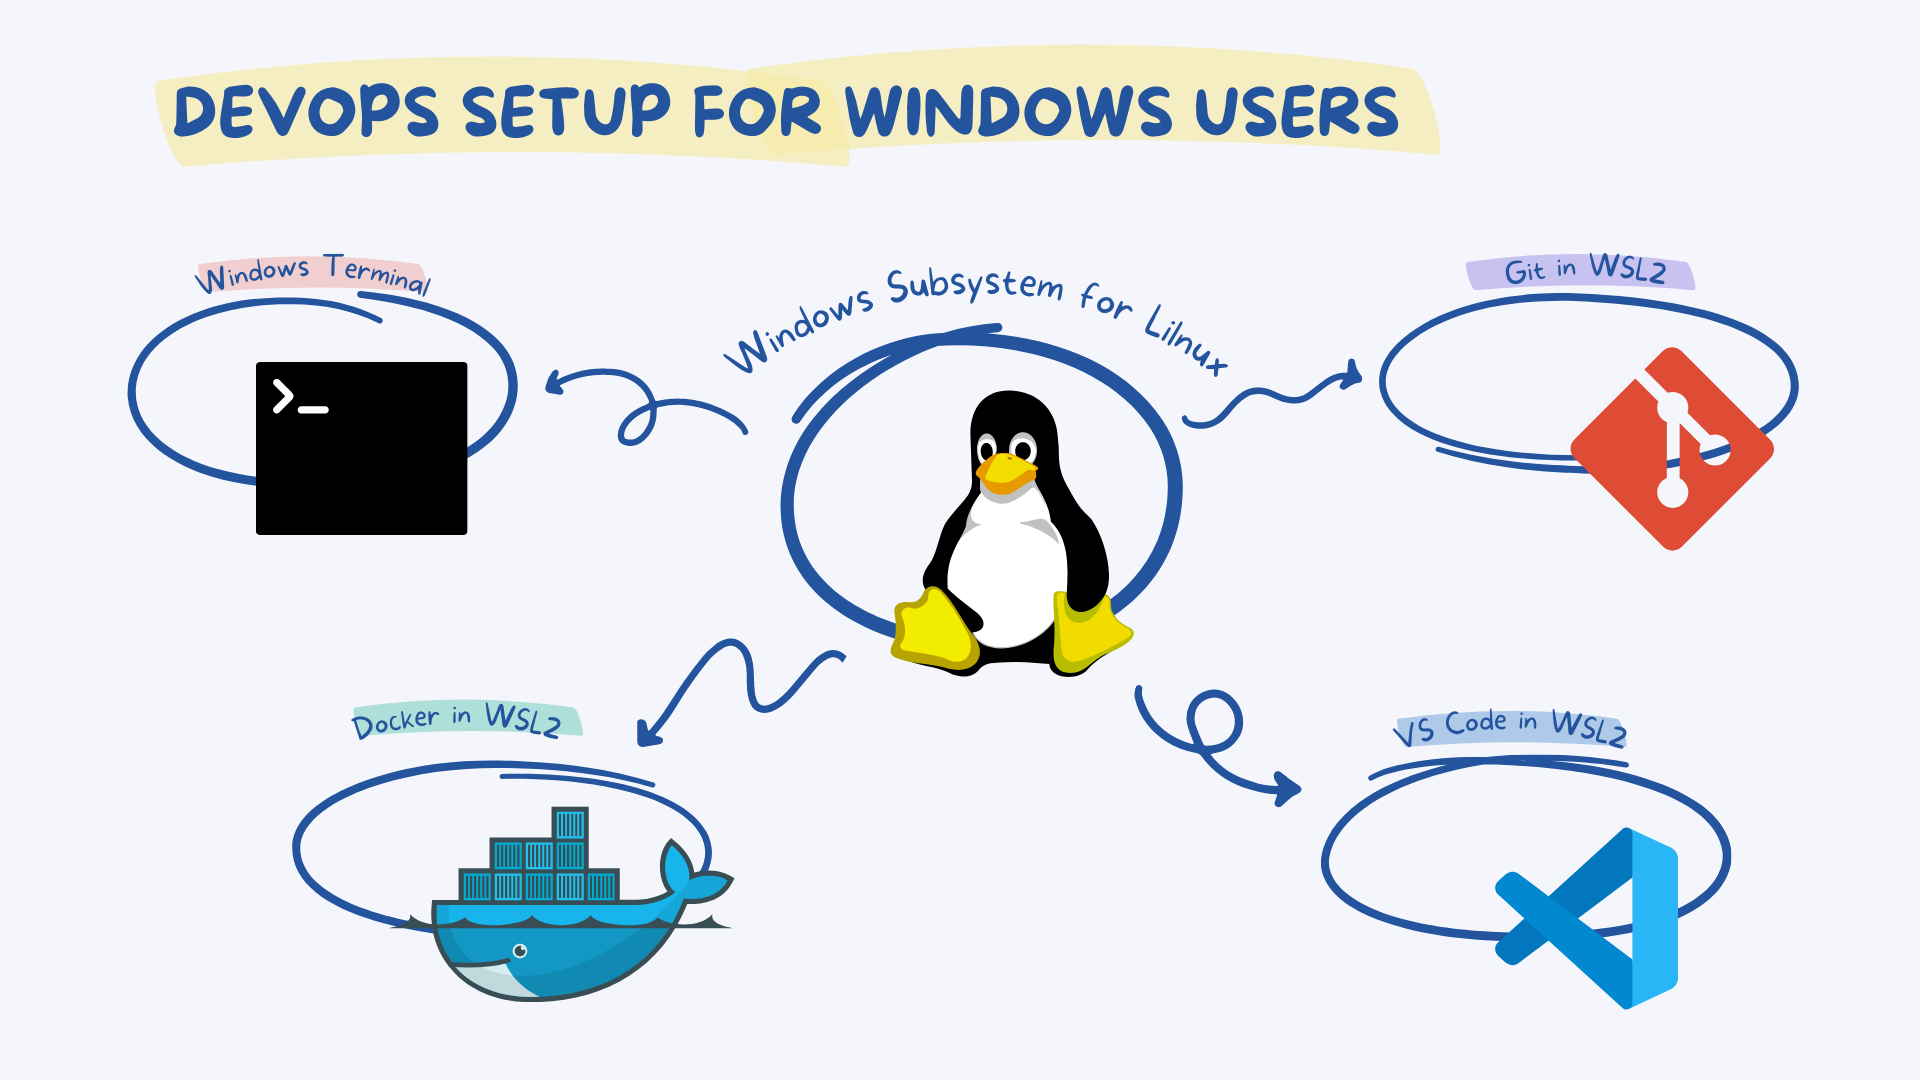
The Main Tools Running in WSL2
The main tools that I use every day running in WSL2 are:
1. The Windows Terminal
2. Git
3. Visual Studio Code
4. Docker
DevOps Setup for Windows Users
Installing Windows Subsystem for Linux (WSL) is very simple. You just need to enter the following command in an administrator PowerShell window and restart your machine.
wsl --install
For more details, check out this install wsl article.
You will also need to set up your username and password in the Linux/Ubuntu VM. These login credentials are separate from your Windows login credentials. Check out this article for more details.
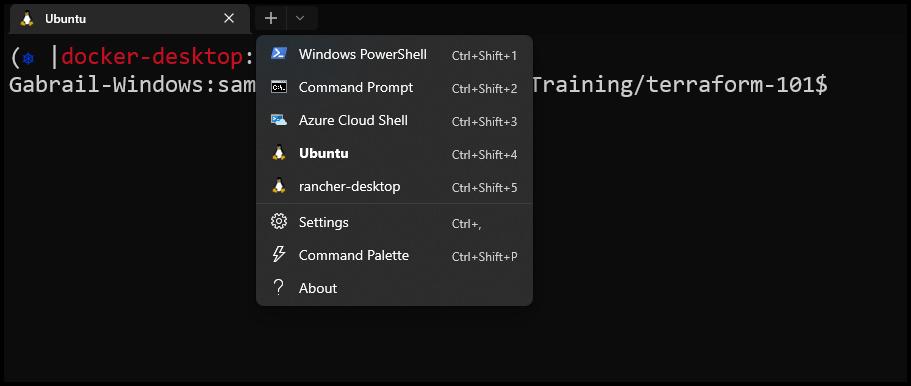
1. The Windows Terminal
Microsoft provides a really good terminal that allows you to work in multiple environments such as:
– Windows PowerShell
– Command Prompt
– Azure Cloud shell
– Ubuntu via WSL
– Other Linux VMs via WSL
There are many great features of this terminal such as splitting the terminal horizontally, vertically, multiple tabs, colour themes, and others. You can check these out by hitting CTRL + SHIFT + P.
The Windows Terminal
For more details, check out this windows terminal installation guide.
2. Git in WSL
The good news is that Git comes already installed with most of the Windows Subsystem for Linux distributions, however, you may want to update to the latest version. You also need to get your git config file set up.
To update git to the latest version on Ubuntu run:
sudo apt-get install git
To configure git:
git config --global user.name "Your Name"
git config --global user.email "[email protected]"
For more details, check out the installing Git for Windows users with WSL article.
3. Visual Studio Code in WSL
Visual Studio Code (VS Code) is an excellent Integrated Development Environment IDE. It is used for development in many programming languages and is a go-to for many DevOps Engineers.
Microsoft has allowed us to use VS Code with WSL via the Remote WSL extension. You can download this extension along with a few others that are very helpful via the Remote Development extension pack. You get the Remote – SSH and Remote – Containers extensions as well.
You can then easily open a VS code window from within your WSL environment by typing code . inside your working folder.
Alternatively, you could also open a Remote-WSL folder directly from VS Code by typing CTRL + SHIFT + P like this:
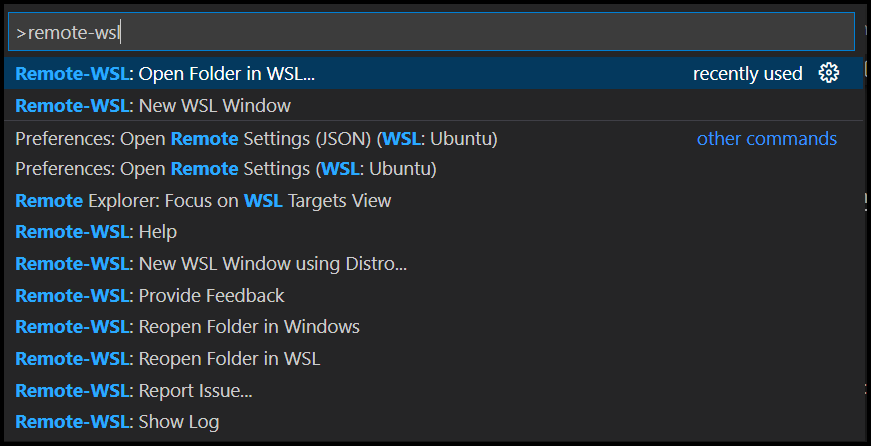
VS Code Remote WSL
For more details, check out the installing Visual Studio Code with WSL article.
4. Docker with WSL
Finally, you would set up Docker Desktop for Windows with WSL2. By enabling WSL 2, you can run both Linux and Windows containers in Docker Desktop on the same machine.
All you need to do is go to the settings page on your Docker Desktop application by clicking the gear icon at the top right. Then Enable the check box: Use the WSL 2 based engine under the General tab.
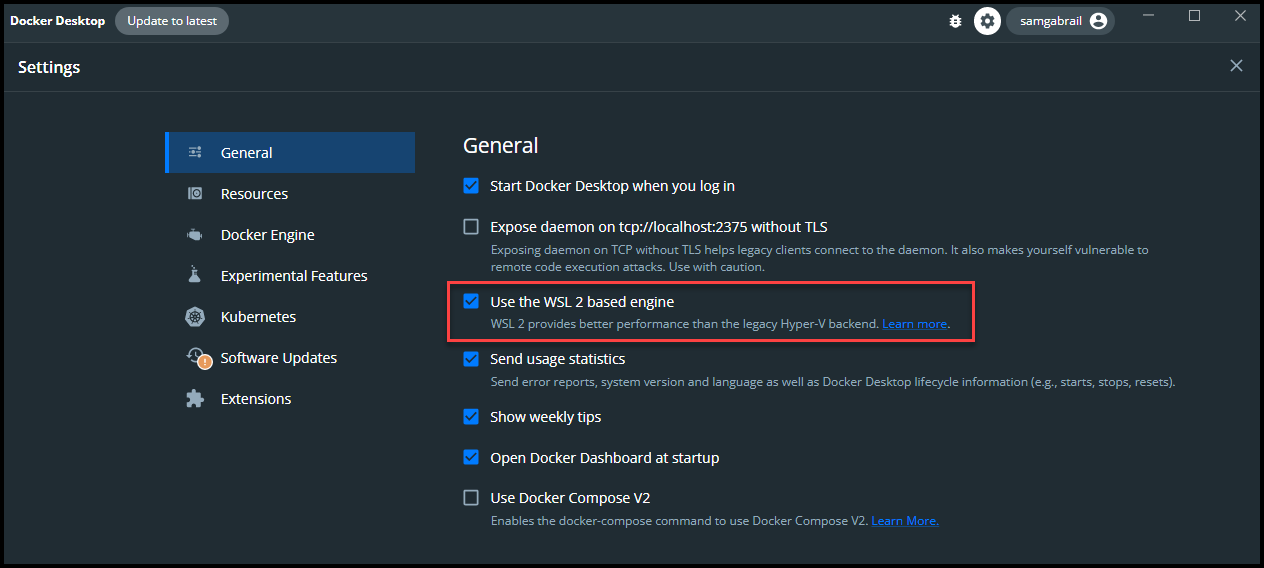
Docker with WSL General Tab
Next, go to the Resources tab and check the box: Enable integration with my default WSL distro.
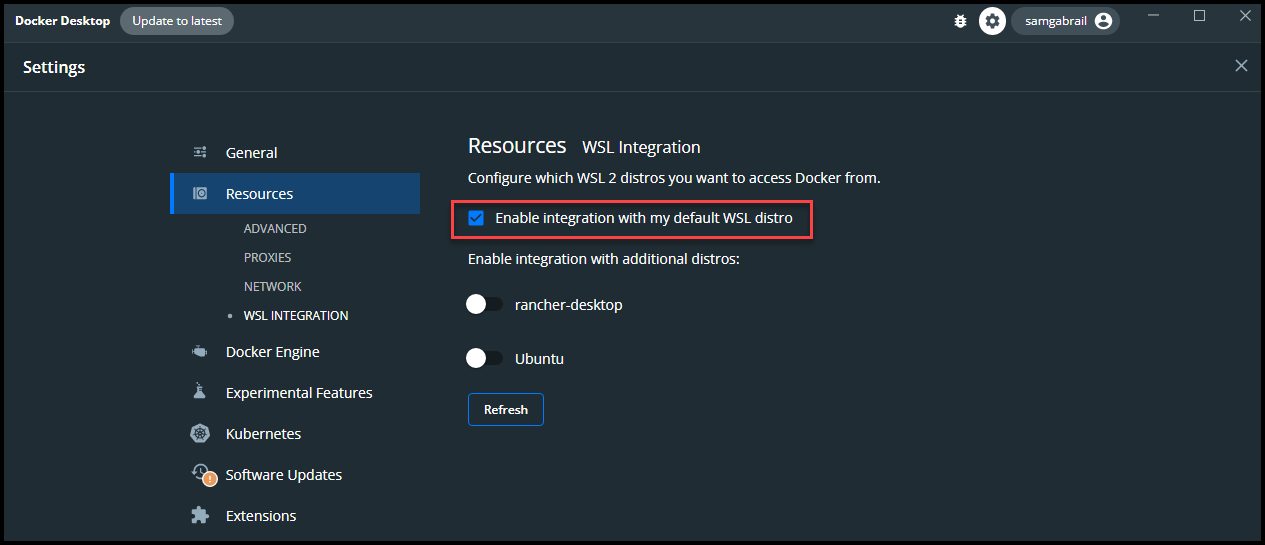
Docker with WSL Resources Tab
For more details, check out the Install Docker for WSL article.
Conclusion
This blog post explained how to run a Linux VM within a Windows environment. It’s almost impossible for a DevOps engineer not to use Linux on a daily basis. Microsoft made our life much easier by introducing Windows Subsystem for Linux (WSL2) a few years ago. We also saw 4 essential tools to use with WSL2. These are:
1. The Windows Terminal
2. Git
3. Visual Studio Code
4. Docker
References
- Install WSL
- Set up your username and password in the Linux VM
- Windows Terminal Installation
- Installing Git for Windows Users with WSL
- Installing Visual Studio Code with WSL
- Install Docker for WSL
Suggested Reading
- env0 – A Terraform Cloud Alternative
- HashiCorp Packer to Build a Ubuntu 22.04 Image Template in VMware vSphere